Introduction
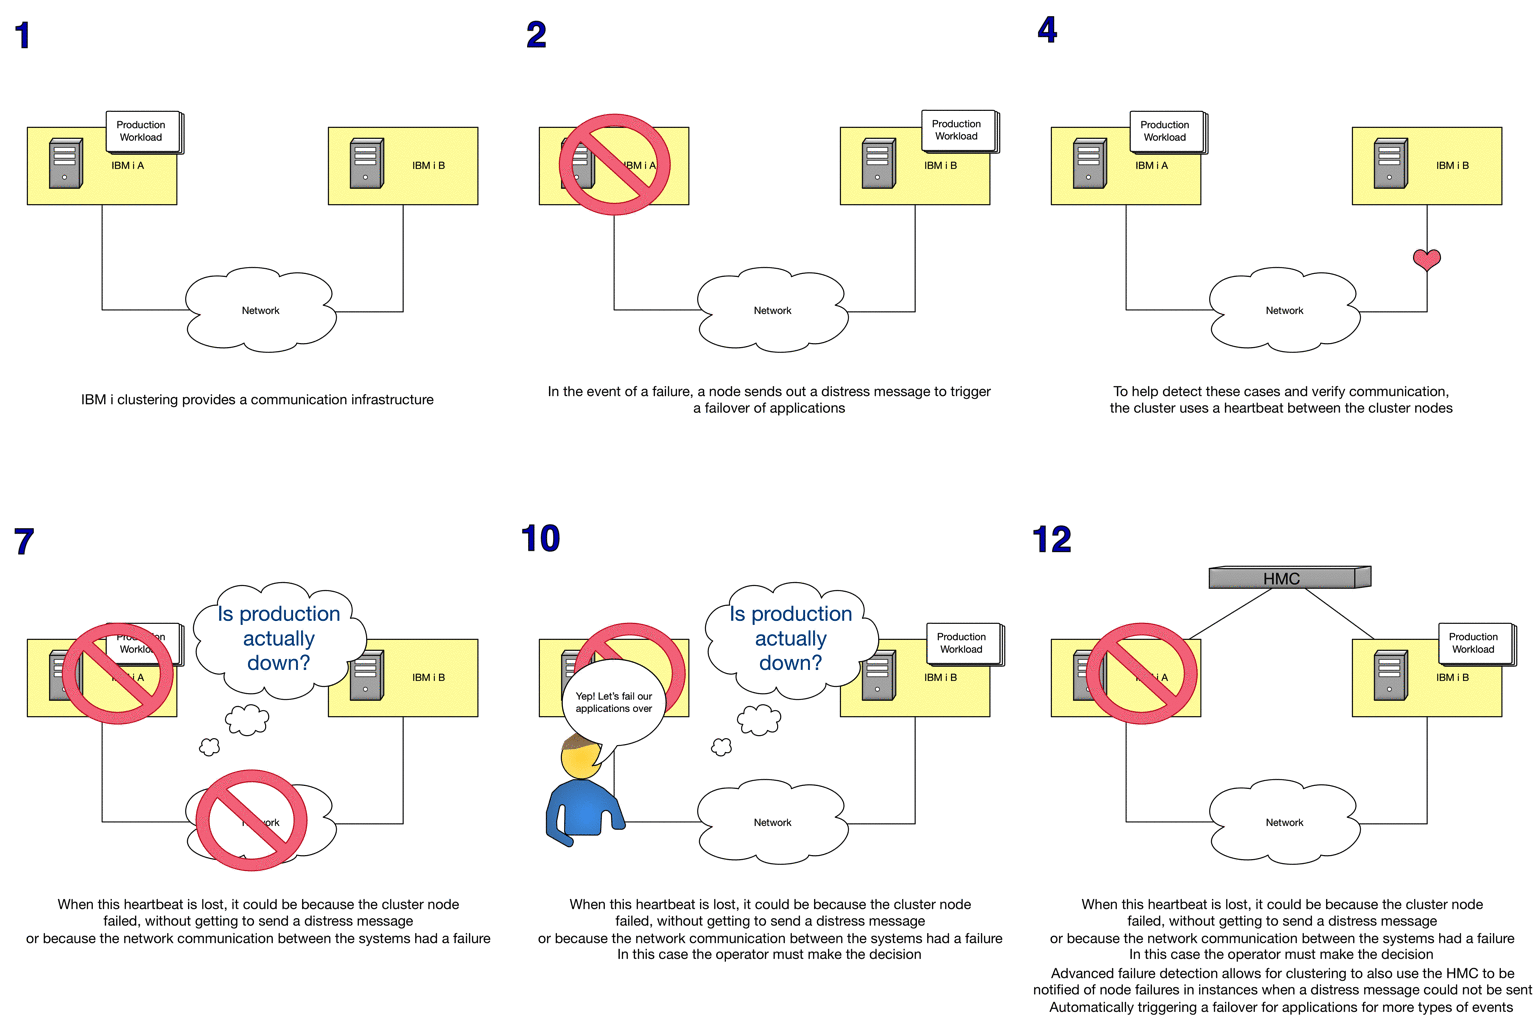
IBM® PowerHA® for i Standard Edition enhanced advanced node failure detection to support a new representational state transfer (REST) interface. The Hardware Monitor Console (HMC) is being updated to replace the existing Common Information Model (CIM) server with a new representational state transfer (REST) based interface. HMC version V8R8.5.0 is the last version of HMC to support the CIM server, and is the first version of HMC to support all REST API functions that are required by IBM PowerHA SystemMirror® for i licensed program. This function is provided through a new function PowerHA PTF.
Software Requirements
- 5770-SS1 Base operating system option 3 - Extended Base Directory Support
- 5770-SS1 Base operating system option 33 - Portable Application Solutions Environment
- 5733-SC1 - IBM Portable Utilities for IBM i (Only required for initial configuration of a cluster monitor.)
- 5733-SC1 option 1 - OpenSSH, OpenSSL, zlib (Only required for initial configuration of a cluster monitor.)
- 5770-HAS IBM PowerHA for i LP
- HMC version V8R8.5.0 or later. This is the first version of HMC to support the REST server
- TLS V1.2 Enabled (See: http://www-01.ibm.com/support/docview.wss?uid=nas8N1020876)
- PowerHA for i new function cluster monitor HMC REST support PTFs:
- V7R1 - PowerHA PTF Group SF99706 level 13
- V7R2 - PowerHA PTF Group SF99776 level 6
- V7R3 - PowerHA PTF Group SF99876 level 3
Configuring advanced node failure detection on hardware management console (HMC) with REST server
A Hardware Management Console (HMC) can be used with advanced node failure detection to prevent cluster partitions when a cluster node has failed.
Before you begin
- Using HMC with a Representational state transfer (REST) server requires HMC version V8R8.5.0 or greater.
- The Add cluster monitor (ADDCLUMON) command must be used with the representational state transfer (REST) server. The PowerHA® graphical interface only supports the Common Informational Model (CIM) server for the cluster monitor.
- Check the QSSLPCL system value. Verify that it is set correctly for the release currently running.
Note: An incorrect value in QSSLPCL may result in a CPFBBCB diagnostic message with reason code 4.
About this task
These steps guide you through obtaining the digital certificate of your HMC, storing it and referencing it to allow advanced node failure detection for the cluster node.
Important: This guide describes steps making use of features of both HMC and of the Digital Certificate Manager. Changes to either of these products may cause portions of this guide to become invalid. If you suspect such changes are preventing you from following the steps outlined in this guide successfully, contact your technical support provider.
Procedure
Begin by extracting the digital certificates for the HMC and copying them to the IBM® i system in the cluster node with these steps:
- Sign on your IBM i system and open the command line display.
- In the command line display, enter CALL QP2TERM to enter the PASE shell environment.
- Retrieve the digital certificates from the HMC with this command: openssl s_client -connect HMC_name:443 < /dev/null | awk '/BEGIN/,/END/{ if(/BEGIN/){a++}; out="HMC_name"a".pem"; print > out}' Replace HMC_name with the name of your system's HMC. This copies the certificates into a files named HMC_name1.pem … HMC_nameN.pem, where N is the number of certificates copied from your system's HMC.
- Press F3 to exit the QP2TERM environment.
- Run the following command for each of certificate file to convert the CCSID to 819 (ASCII) CHGATR OBJ('HMC_nameX.pem') ATR(*CCSID) VALUE(819).
Create a certificate store to hold the digital certificates by following these steps:
- Open the IBM Navigator for i and click Internet Configurations.
- On the Internet Configurations page, click Digital Certificate Manager. You need to enter your user profile and password.
- In the Digital Certificate Manager page, click Create New Certificate Store.
- In the page that appears, you should have an option for *SYSTEM. Make sure that the button is selected and click Continue. If the *SYSTEM option is not there, you already have a *SYSTEM store created. Skip forward to step 12.
- Select No - Do not create a certificate in the certificate store.
- Create a password for the *SYSTEM store and click Continue. The password is case-sensitive. It is recommended not to use special characters. This password is not attached to a user profile and it will not lock you out of the system after too many retries. You have successfully created the *SYSTEM store.
Select the *SYSTEM certificate store by following these steps:
- Click Select a Certificate Store and select the *SYSTEM option, click continue.
- Sign in with the password for the certificate store and click Continue, then Manage Certificates.
Import the HMC certificates into the security store
- Select Import certificate and click Continue. If your HMC has only one certificate, perform these steps for that certificate. If your HMC has multiple certificates, perform these steps for each certificate except the first certificate (HMC_name1.pem), starting with the last certificate and moving backwards through the list of certificates. For example, if there are three certificates: HMC_name1.pem, HMC_name2.pem, and HMC_name3.pem, perform these steps forHMC_name3.pem first, then for HMC_name2.pem.
- Select Certificate Authority (CA) and click Continue.
- Enter the path name of the certificate you want to import. For example, the path and file name may be /HMC_name1.pem. Click Continue.
What to do next
After importing the certificates, sign on to your IBM i and use the command line to run the Add cluster monitor (ADDCLUMON) command to run the cluster configuration steps. For additional information about ADDCLUMON, see the Add Cluster Monitor (ADDCLUMON) command in the Knowledge Center.
More Information
For more information see the following topics in the IBM i Knowledge Center:
